Materials needed: None.
- In OBS, navigate to the “Aud Display” or “Audience Display” scene in the bottom-left corner.
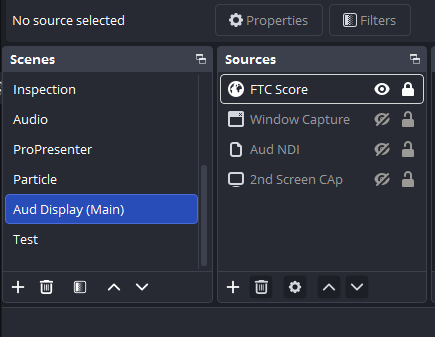
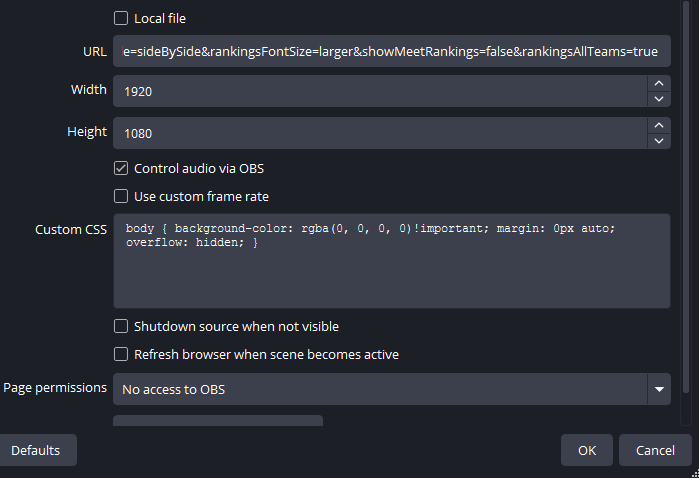
- Double-click on the FTC Score or Browser source. This may be named something different, but the icon (globe) should be identical to the one shown above. Paste the URL copied from stage 5a into the “URL” field. Verify that all settings are the same as shown in the screenshot below. Click OK once confirmed. Note: Adding the
!importantflag in the Custom CSS field where shown is very important to ensuring the transparent parts of the screen are correctly made transparent.
- Click on the Center and both Field scenes and verify that all camera inputs are populated as expected. Check cable connections if any are not operating as expected. A disconnected cable is the most common source of no video. A faulty cable is also a potential culprit.
- Ask the Scorekeeper to change video scenes to a scene with output from the scoring system and then a “video only” screen. You should see the camera be overridden by the scene with scoring system output and the cameras show again with the video only screen.
- Still within the Aud Display or Audience Display scene, click once on the FTC Score or Browser source to reveal the source options, and then click “Interact”.
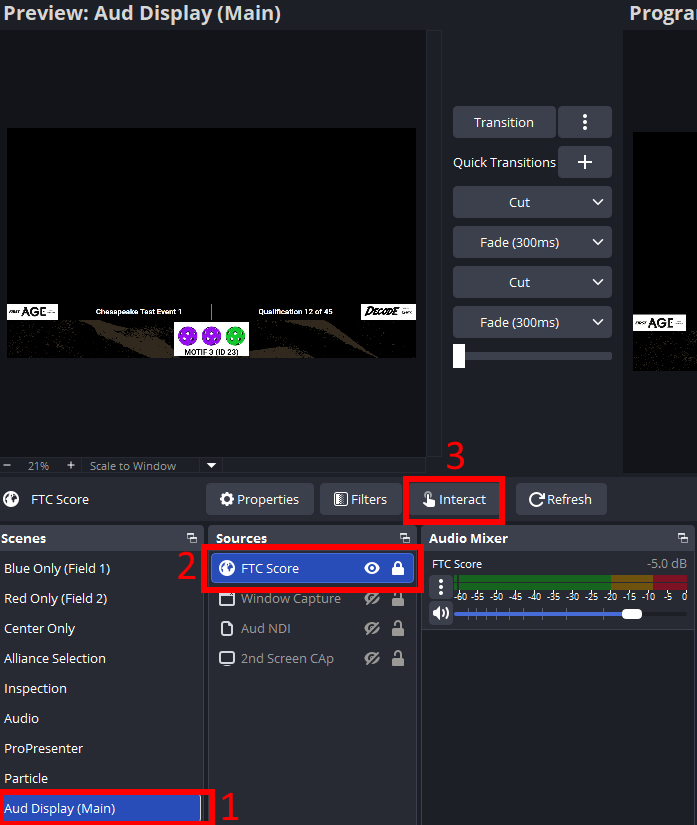
- A window opens. Move the mouse to the top-right corner of the window and click the cog button that appears.
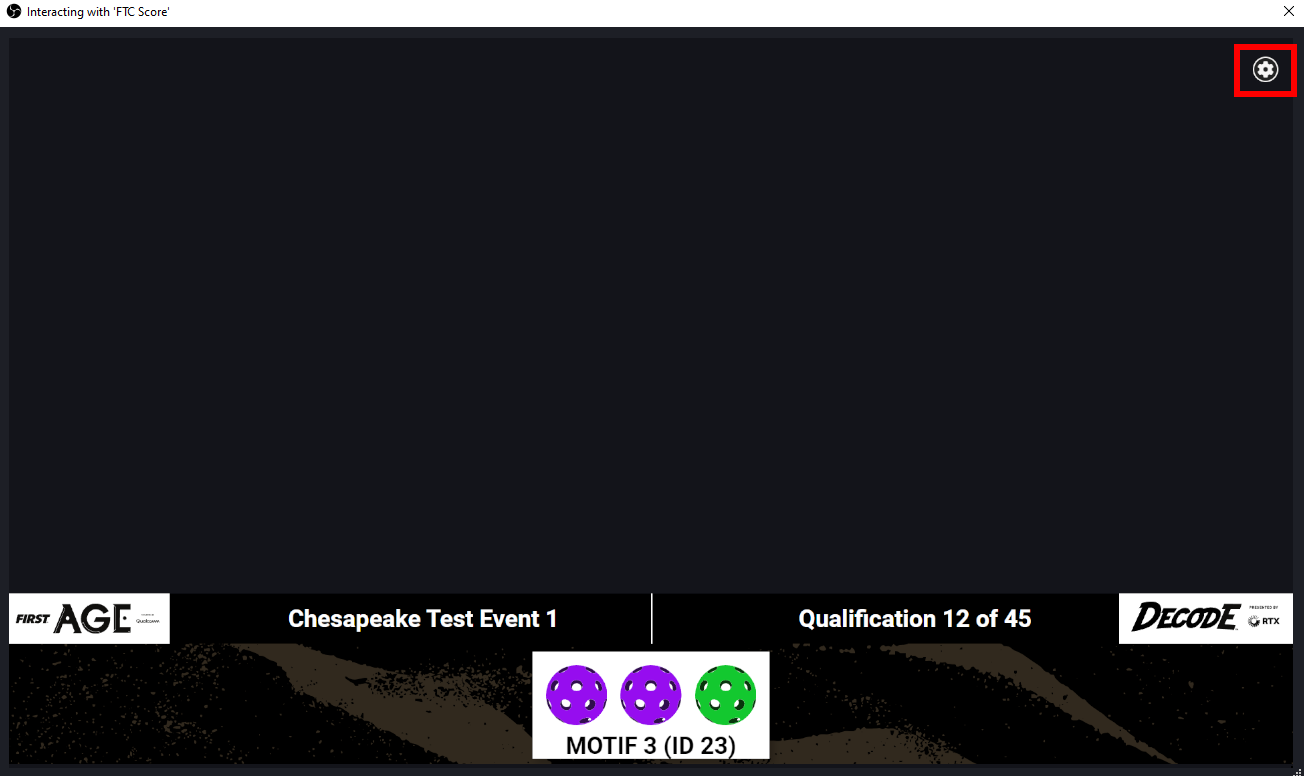
- Within the settings menu, click on the top bar labeled “Audio testing”. Click the “play” button to verify that game sounds register both in the OBS audio mixer and come out of the speakers. If they do not, follow the steps below to verify that the FTCLive output is being routed correctly. Make sure to close the settings menu by clicking “Cancel” before closing the interaction window.
Tap to expand/collapse instructions on checking if FTCLive is outputting sound
- Ensure one of the Field scenes is on “Program”, which will make sure you see the “FTC Score” source in the Audio Mixer. If the FTC Score source was missing or the wrong scene was loaded, try the sound effects again.
- If that didn’t work, click the three dots next to FTC Score’s Audio Mixer entry and select “Advanced Audio Properties”.
- In the window that opens, verify that FTC Score has its “Audio Monitoring” setting set to “Monitor and Output”. Close the window and try the sound effects again if this wasn’t set.


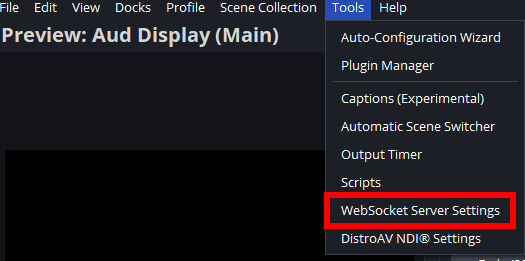
- Under the “Tools” menu bar, click “WebSocket Server Settings”.
- In the window that opens, if not already enabled, check the box for “Enable WebSocket server”, select apply and then OK.
- Reopen Tools > WebSocket Server Settings (if the server had to be enabled), otherwise, click the “Generate Password” button, then Apply, then “Show Connect Info”.
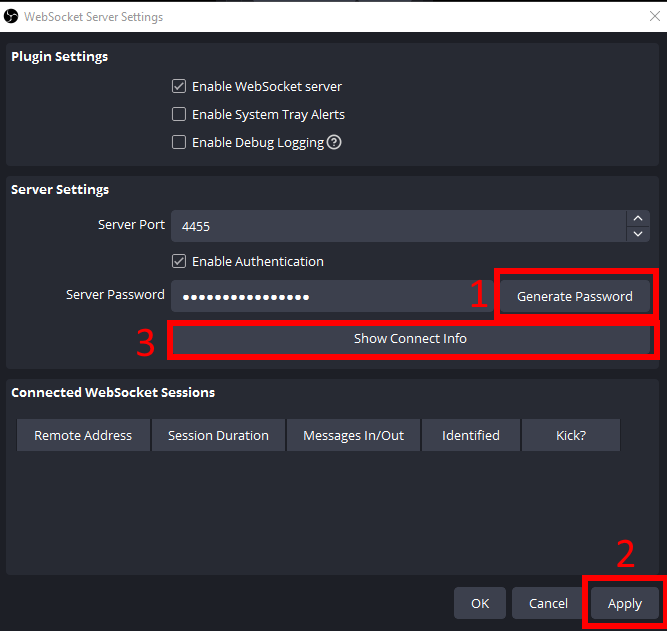
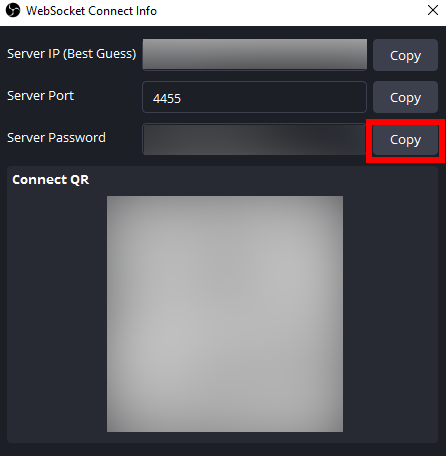
- Click the “Copy” button next to the server password. Do not disclose these credentials to anyone else.
12. Open the auto-switcher tool at https://obs.vens.co in a new browser window.
- Input the IP address of the FTC Live server (e.g., 192.168.1.100) and click “Get Event Codes”. The dropdown list will populate with a list of events configured on the server. Select the current event and then select “Connect”. The indicator should turn green and show “Connected”.
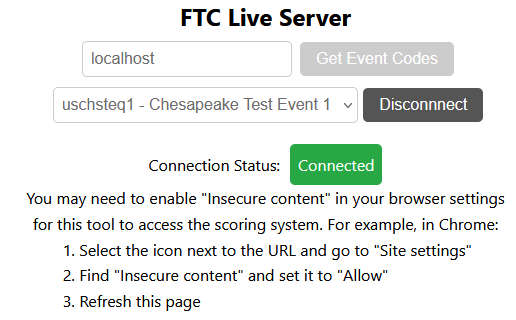
Note: The server address will not be “localhost”, as shown in this screenshot. - In the OBS Studio Connection section, leave the default address of “localhost” and port 4455 in. Paste the password we copied in before and hit Connect. The OBS indicator should change to “Connected” and the other three indicators should update to show the current status of OBS.
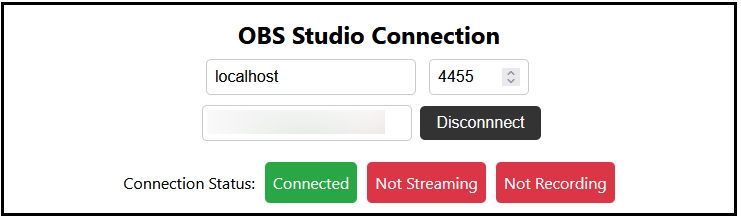
Error Code 604?
If you encounter an error when connecting to OBS Studio with code 604, this can be resolved by enabling the OBS replay buffer. Click Settings, then Output, then scroll to the bottom and enable the Replay Buffer. The buffer does not need to be started, just enabled in the settings. The connection should succeed once this has been completed.
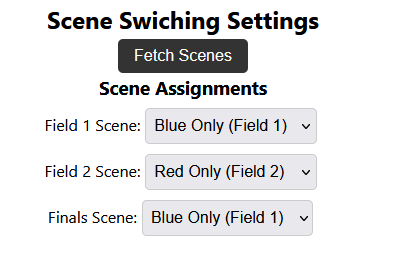
- Proceed to the “Scene Switching Settings” section. Click the “Get Scenes” button to unlock the scene selections. Set the Field 1 and Field 2 scenes to the appropriately-named OBS scenes. Set the Finals Scene to the Field 1 scene as a placeholder. This scene refers to the last stages of the playoffs (where only one field is used), and the switcher isn’t technically necessary for this. Update this value as determinations are made as to which field the finals will be on.
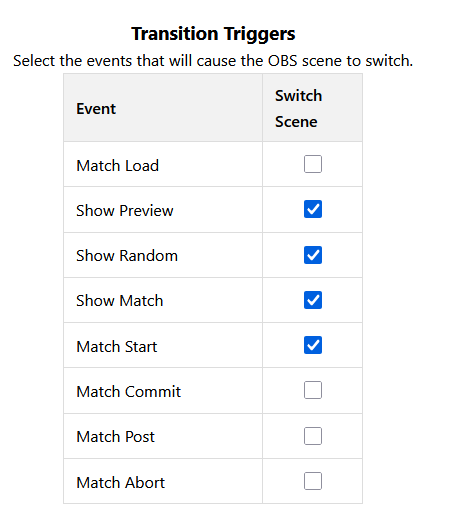
Then select the triggers which should lead to the scenes being recalled. The following configuration is recommended, but may be modified to suit the stylistic vision if desired. The “Match Start” trigger must remain enabled as a failsafe measure at all times.
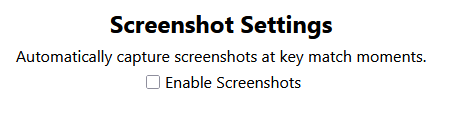
- Proceed to the Screenshot Settings section. Uncheck the checkbox for “Enable Screenshots”.
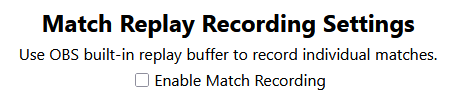
- Proceed to the Match Replay Recording Settings. Uncheck the checkbox for “Enable Match Recording”.
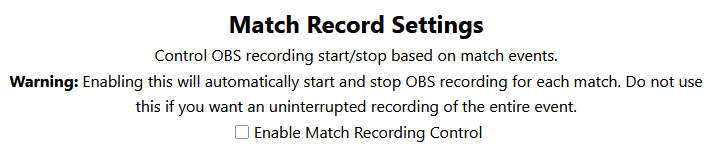
- Proceed to Match Record Settings. Verify that the checkbox for “Enable Match Recording Control” is unchecked (default setting). If it is checked, uncheck it.
- Leave this browser window open for the duration of the event or the auto-switch functionality will stop working!
Stage 5b and Track 5 is complete! Typically, AV setup is complete at this point! Congratulations!