Supplies needed: Projector screen case, projector box.
This setup step requires at least four persons present to assist. The screen is very large and heavy!
- Unpack components of the screen. There will be one screen frame, two screen legs, and the screen itself in a pouch. Have one person unfold each leg.
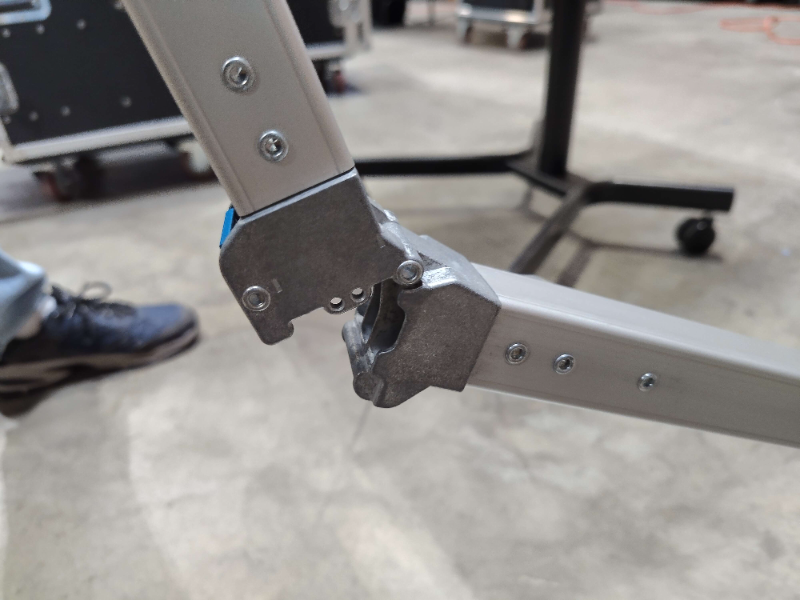
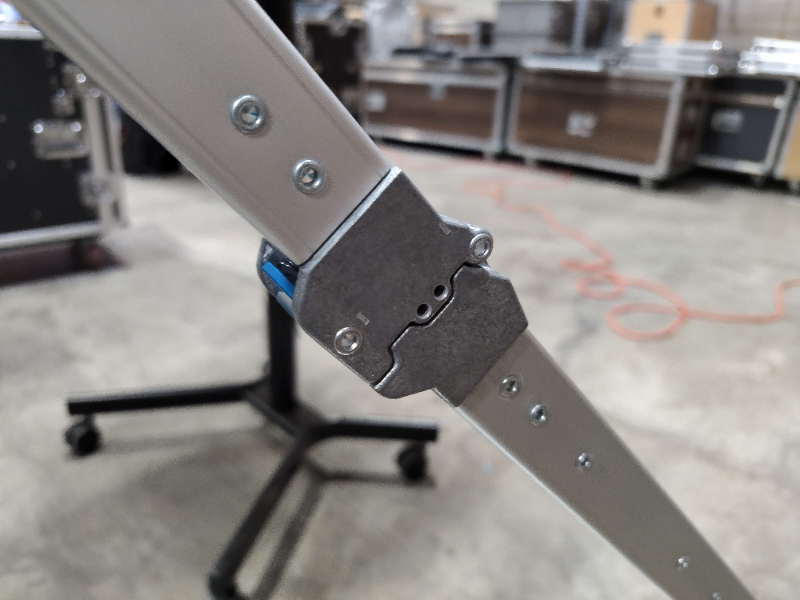
- Unfold the screen frame. It is the component which has wheels attached to it along lengths of the aluminum tube. Be sure to unfold the frame so that the wheels face the floor. Have three people unfold the screen frame, one on each side and one to float around the perimeter.
Tap to expand/collapse steps on unfolding the screen frame.
Start by unfolding the screen frame itself lengthwise (in the same direction as all the aluminum tubes run). The screen frame unfolds like the letter “N”. Make sure the side of the frame with the wheels faces towards the floor as you do this. Make sure that all joints “click” securely into place.
With a helper, grab one side of the outermost long aluminum rails. Slowly walk away from each other to unfold the screen frame widthwise. Make sure that all joints “click” securely into place.
Make sure all corner braces are locked. They should appear as a continuous piece of metal without any joints.
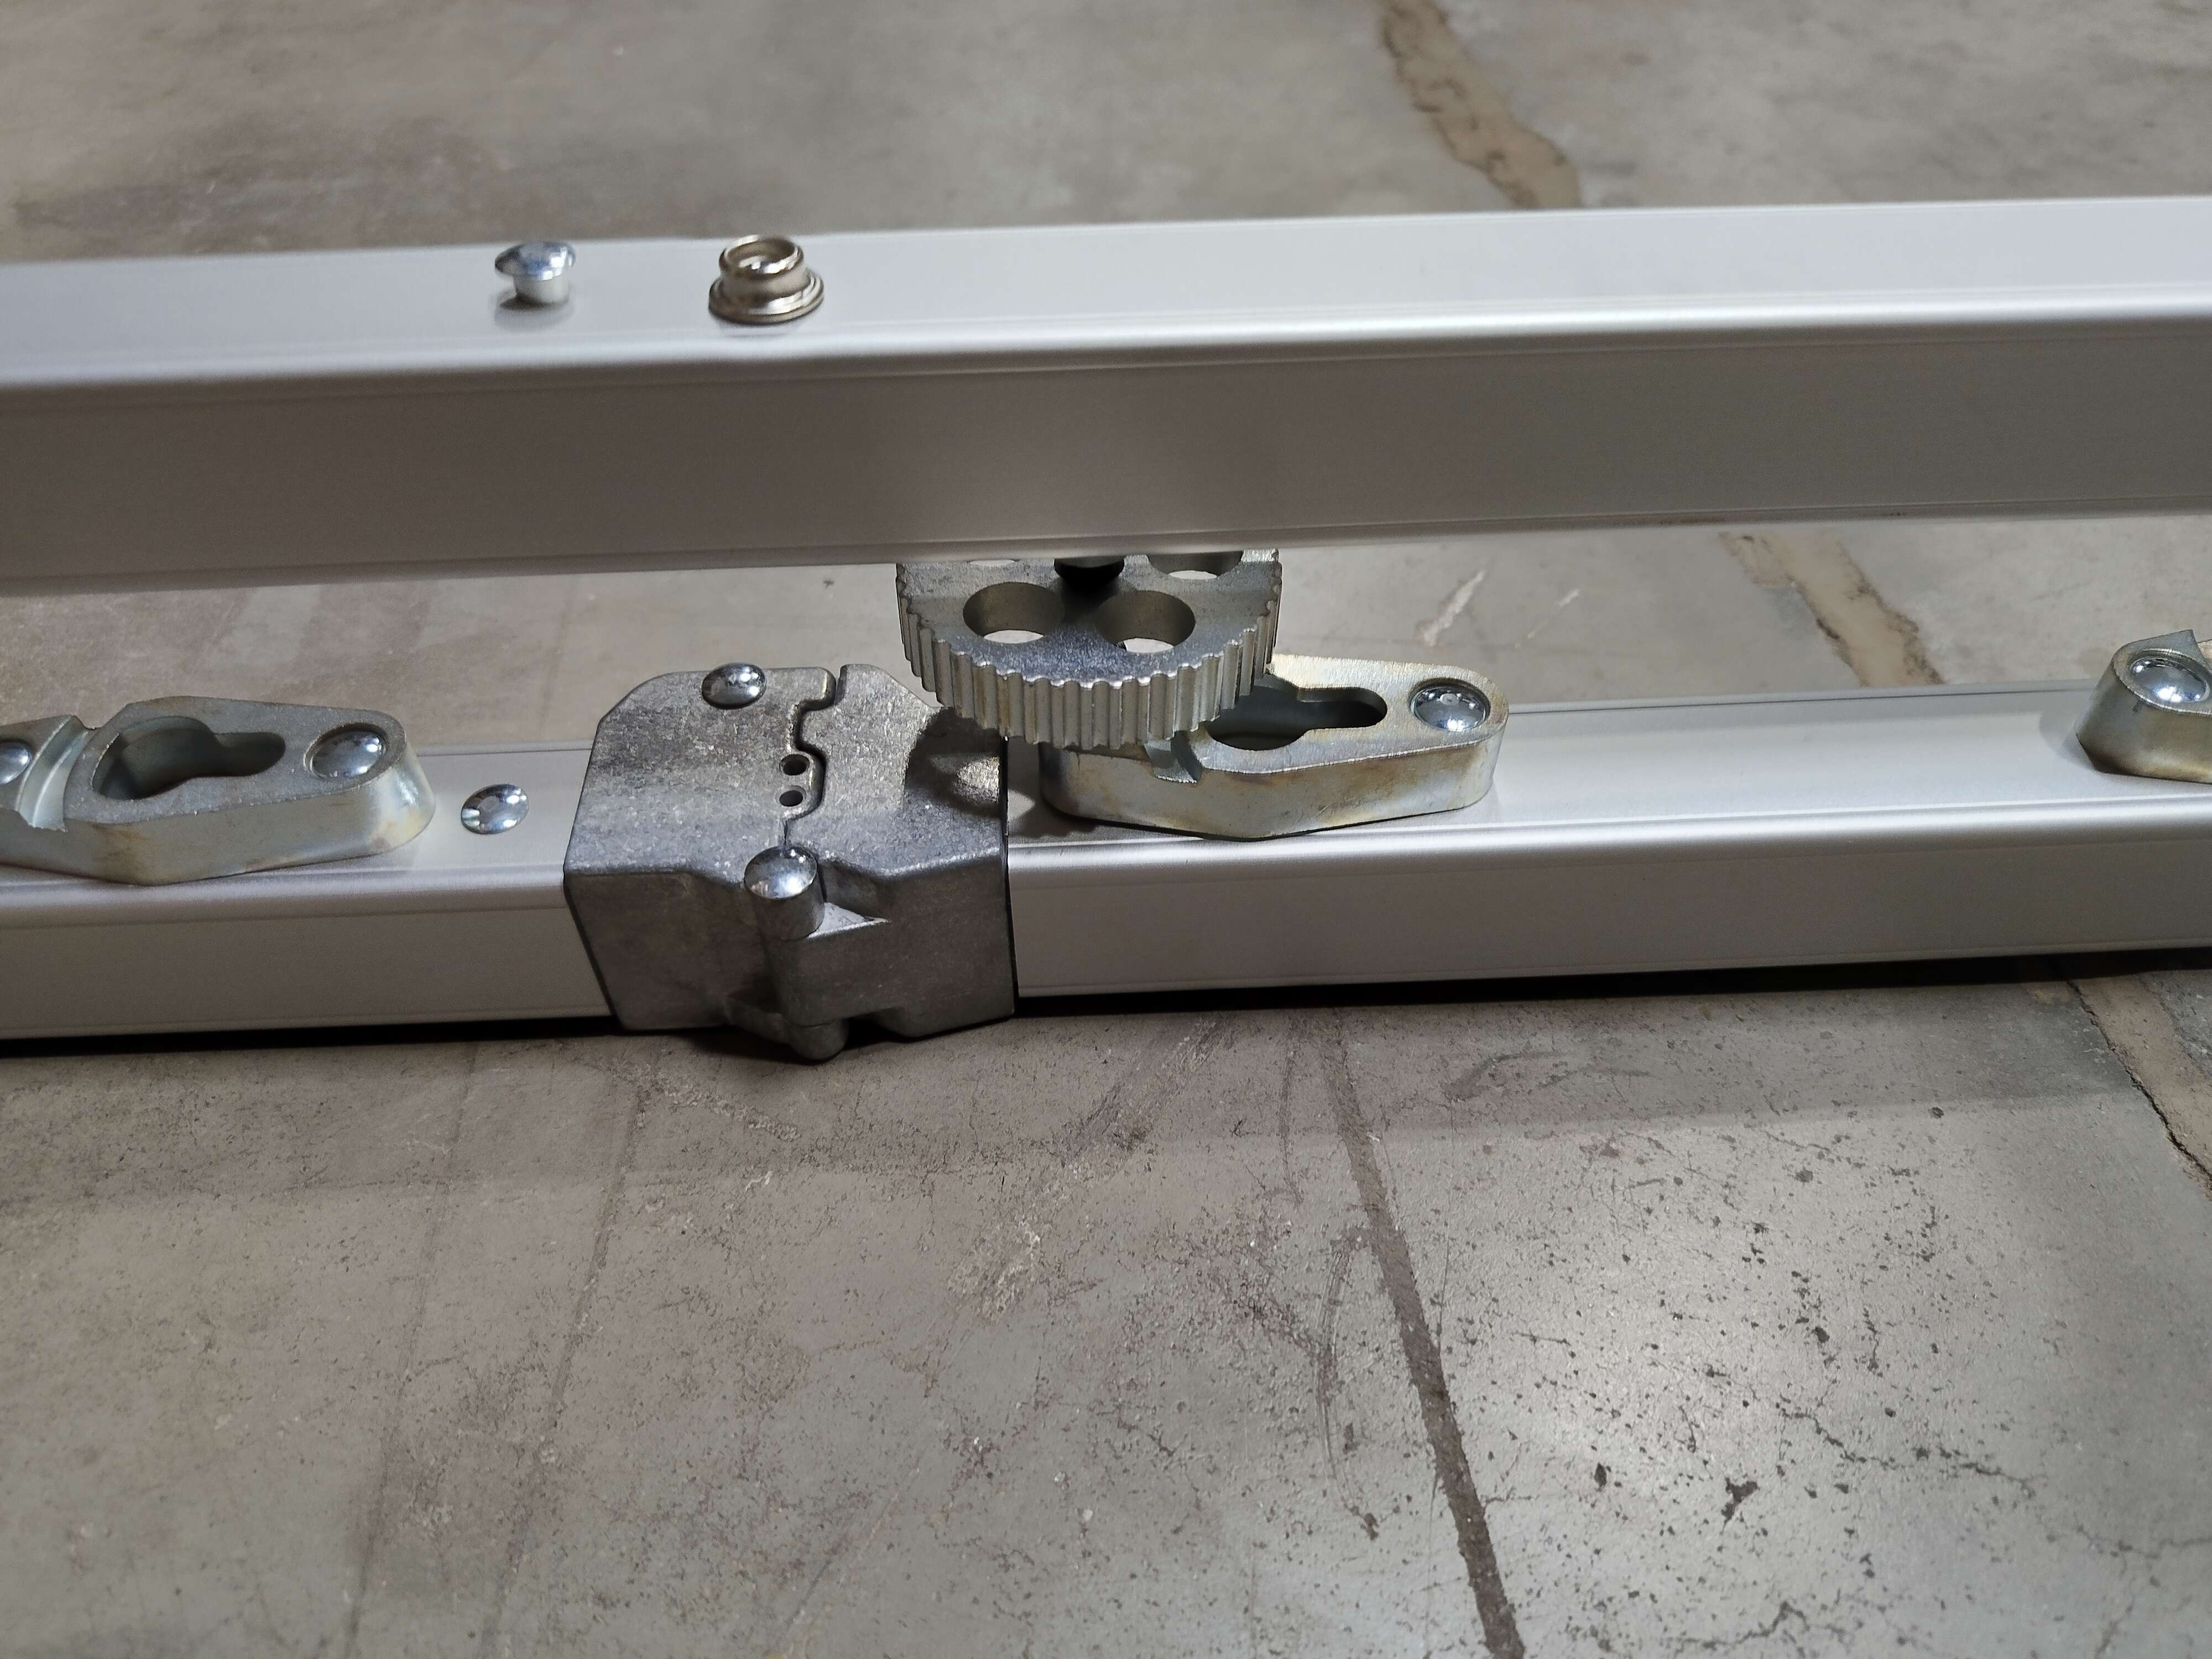
- Next, unfold each leg. The legs are the components which have the keyways attached to them. Be sure to unfold the legs so that the keyways face the ceiling. Do not unfold the feet on the legs yet.
TODO: Get a photo of the colored tape on the frame and legs lining up.
2. Attach the screen legs to the frame, ensuring that the topmost keyway on the screen legs matches with the third highest wheel on the screen frame (the topmost wheel will not be attached to the leg).
Tap to expand/collapse steps on attaching the screen legs to the screen frame.
Slip the leg underneath the frame. Locate the studs on the frame into the opening on the keyway on the leg. In the standard setup, 3 studs will be engaged on each side of the screen. Ensure that the topmost keyway on the legs engages with the third wheel from the bottom.
Slide the leg downwards on the frame, pushing towards the feet of the legs. The leg should slide a few inches into the closed portion of the keyway.
Visually verify that each stud has engaged with a keyway securely, then turn the wheels clockwise to secure.
- Retrieve the screen material from the pouch. With a helper, unfold the screen with the front side facing up. In this orientation, the buttons around the side and top perimeters of the screen have their openings facing the floor. The bottom of the front of the screen material has button openings facing in both directions, as well as the manufacturer’s logo.
Avoid Screen Contamination or Damage
The front side of the screen should not be allowed to touch the floor, as it can result in dirt or contamination being left on the screen.
- Attach the buttons on the screen to the riveted buttons on the screen frame. It is easiest to do this if all four corners are attached first.
Tips for Screen Attachment Success
The screen surface is placed under high tension while in operation, thus it will take a high amount of force to attach at some points. If starting with the four corners, bracing your feet against the corner of the screen frame allows you to use your legs to assist in this process. When all four corners are attached first, the rest of the buttons can be rolled onto their studs and pressed down, lessening the total amount of force needed for the full process.
- Unfold the front foot on both legs and lock the brace in position. The front foot faces the ceiling while the screen is lying down.
- Assign 4 persons as follows: One person on each top corner, and one person at each foot. The persons at the foot of the projector screen should step on the back foot to ensure it stays on the ground and to help keep the screen stable. The persons at the top corner of the projector should, together, slowly lift the screen and begin walking their hands down towards the feet, pivoting the screen up.
- While the persons who started at the top corner keep both hands on the screen, the persons at the feet lock the back brace into position once the screen is upright. They should then tighten the knob in the center of the leg to secure the screen into position.
Stage 4a is complete. Proceed to Stage 4b.