Supplies needed: None.
The mic antenna needs to be connected before carrying out these steps. This should have been done prior to starting on this stage. If the antenna is not connected, follow the steps in stage 2a first.
- Pick any receiver and push the knob in to bring up the menu.
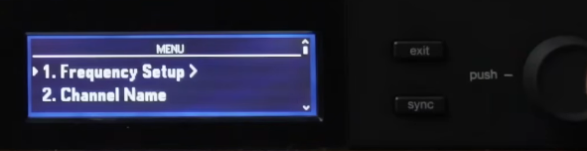
- Press the knob again, selecting the first option, Frequency Setup.

- Press the knob again, selecting the first option, Guided Frequency Setup.

- Press the knob again, selecting the first option, Initialize My System.
- The receiver will then show a series of prompts. Follow the prompts. The “transmitters” are any wireless microphones - be sure to switch all of them off.


- After the receiver conducts the scan, verify that it reports that there are 6 receivers present. If it does not, check that all receivers are powered on and that the Ethernet icon
 is lit up on the top-right of the receiver’s screen. If it isn’t, use the large rocker switch above the stack of receivers to power cycle the receivers. This should fix any networking issue. Hit ‘exit’ repeatedly to return to the home screen and restart the process if you find or fix any issues.
 - Press the knob to “Assign” the frequencies. All six receiver screens should flash a few times to show that they have received and applied the new settings.
Stage 2b is complete. Proceed to stage 2c.