Supplies Needed: Field perimeter case, Long SDI cable (potentially more than one, depending on distance), SDI coupler (if more than one SDI cable is required), SDI to HDMI converter, projector, tablet, extension cord, power strip, one or more lengths of pipe and drape (depends on venue, see step 9).
-
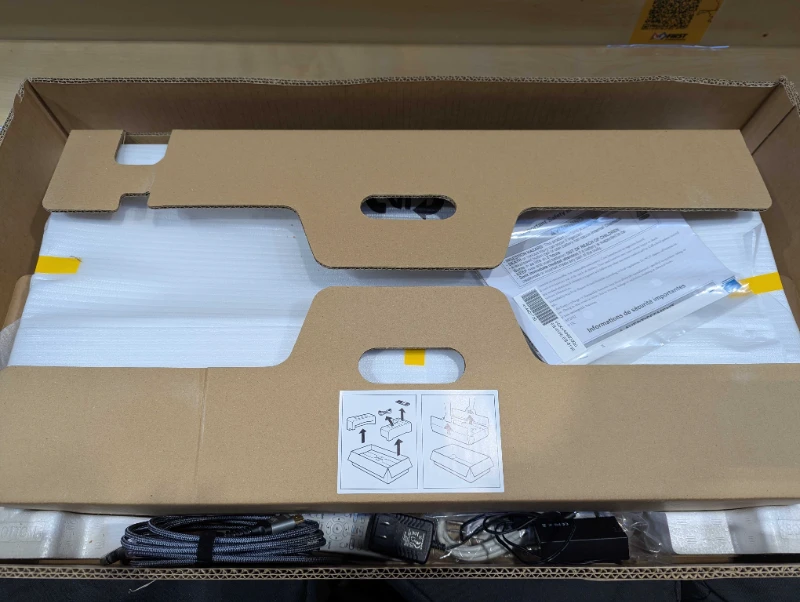
Retrieve the projector and SDI to HDMI converter (inside the box) from the AV case.
-
Retrieve the tablet from the Production Drawers.
-
Retrieve an extension cord and power strip (or an extension cord with multiple outlets) from the power AV tote.
-
Retrieve a tan field perimeter case and and an unused tote. Place the tote on top of the case.
-
Roll the case and tote between the legs of the projector screen.
-
Place the projector on top of the case and tote.
-
Connect the projector to power using the power strip or the extension cord with multiple outlets.
-
Turn on the projector using the power button on the remote or on the back of the projector.
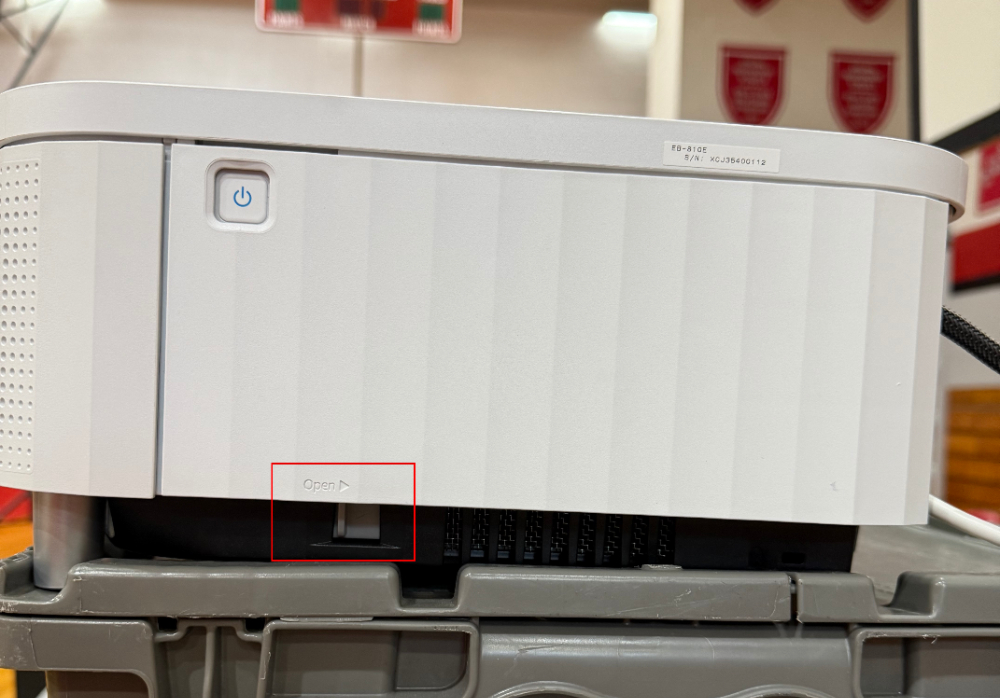
Side Panel
The side panel can be opened to reveal all face buttons using the release slider below the pane.
- Use the Epson Setting Assistant app on the tablet to calibrate the projected image to fit the screen.
Tap to expand/collapse detailed steps on using the setup app to calibrate the projector.
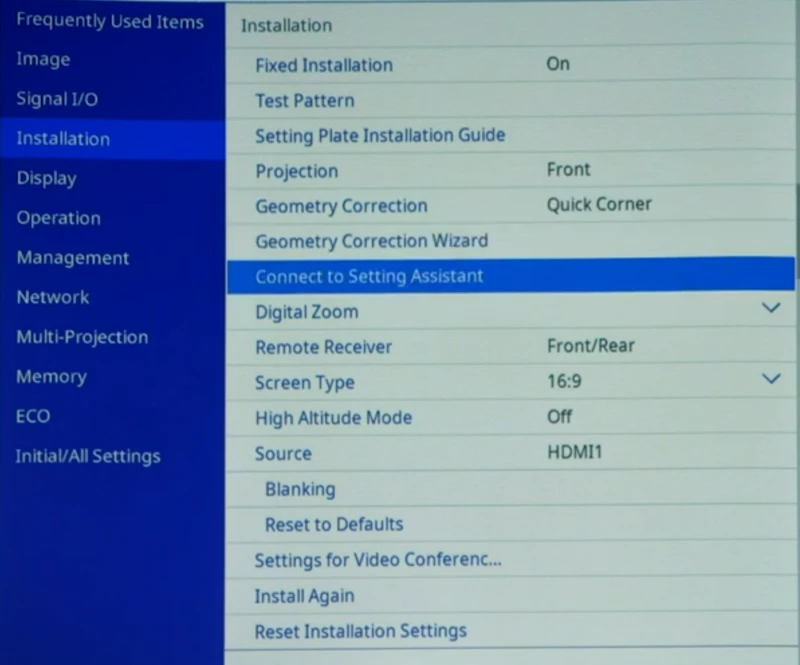
Using the remote or menu buttons on the projector, press Menu to open the projector menu. Navigate to “Installation” on the sidebar, then press Enter. Press the down arrow to find, and then press the Enter button to select “Connect to Setting Assistant”.
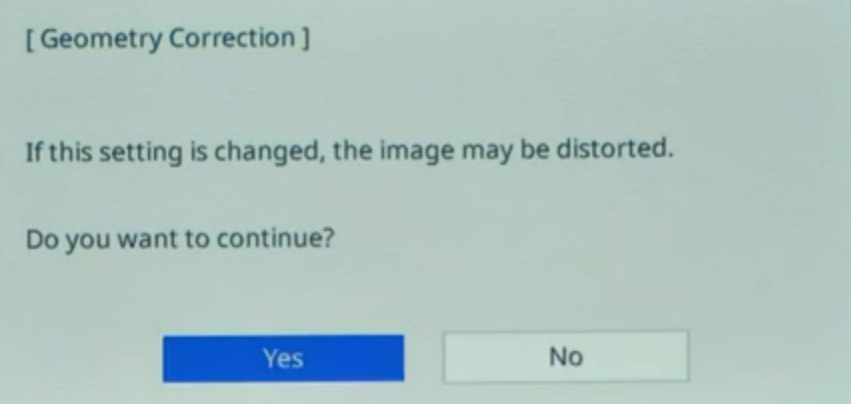
Accept the prompt that appears.
While the projector generates a QR code, open the “Epson Setting Assistant” application on the tablet.
At the initial screen, select the option to “Connect using a QR code”. This option is located inside the “Business” heading for model number EB projectors.
Scan the QR code and press “Join” when prompted to connect to a Wi-Fi network.
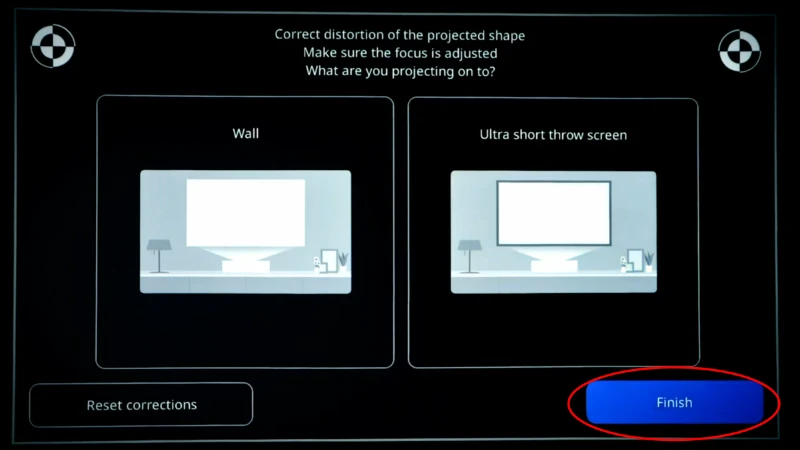
The app allows for setup either projected onto a wall or onto a screen. Since we are using a screen, select this option to proceed with setup.
Analyze the screen shape and compare it with that presented in the app. If the image is very crooked or keystoned, make manual adjustments to improve the baseline image’s shape.
Take a picture of the pattern, ensuring that the full pattern and screen is captured. Follow prompts in the app.
Once the adjustments are finished, press the “Close app” button. Leave the projector to process, eventually it will proceed to the following screen.
Press the “Finish” button here, as we will not adjust the image further.
- If the screen is located in an area where patrons or teams may run into or lean against the projector or screen, place pipe and drape around the screen and projector to lessen the chances of collisions.
Stage 4b and Track 4 is complete! Typically, the next step is to complete stage 5a . You can also Return to the index.