Supplies needed: None.
Start by opening Syncthing and syncing the media cache.
- Open the Syncthing interface by navigating to http://locahost:8384 (this link will only work on a machine that has Syncthing running).
- Verify that at least one peer is connected and sync media.
Tap to expand/collapse detailed steps on verifying Syncthing status and initiating a sync.
- Open the web browser and navigate to http://locahost:8384.
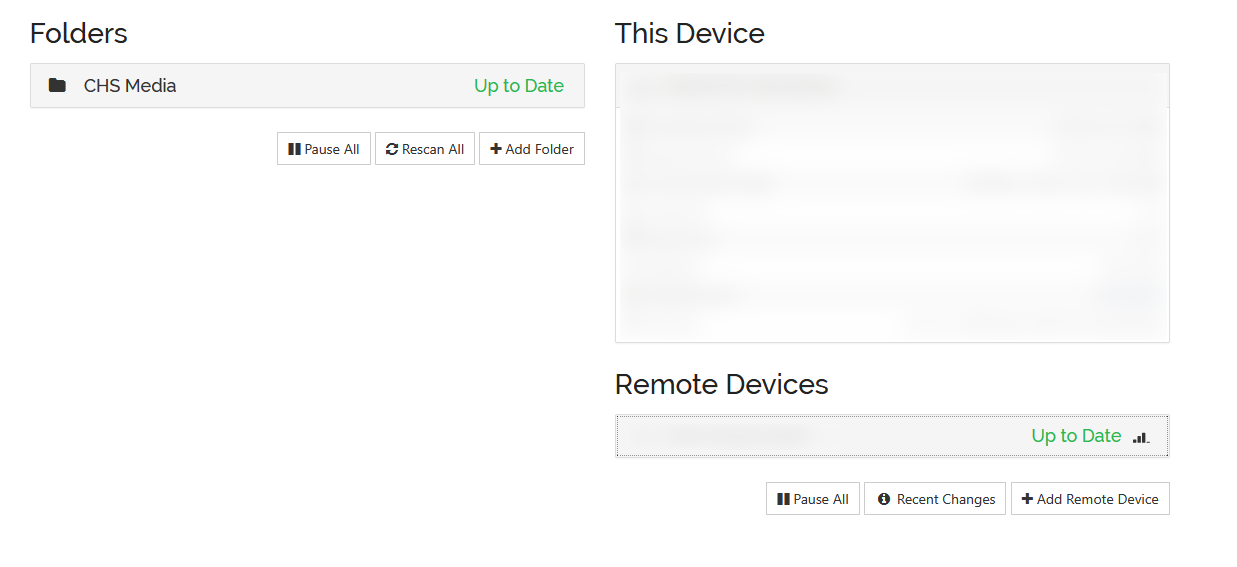
- Check the right-side column labeled “Remote Devices”. At least one device in this list needs to have the word “Connected” or “Up to Date” listed next to it. The screenshot above shows a successful connection.
- If no devices are listed as “Connected”, start by verifying basic Internet connectivity (refer to FRC/FRC-AV/Track 1/1d. Test Connectivity or FRC/FRC-AV/Track 1/1e. Troubleshoot Connectivity Issues if necessary). If basic Internet connectivity is present, it is likely that the Syncthing traffic is being blocked by the school’s firewalls. If possible, work with venue IT staff to unblock the traffic, otherwise it may be necessary to temporarily utilize a hotspot to successfully sync. Consult with the FTA or Equipment Manager if you believe Syncthing is being blocked.
- Click the Rescan All button in the left-side column once connection to at least one peer is established.
Next, open OBS.
- Double-click on the OBS icon on the desktop to open it.

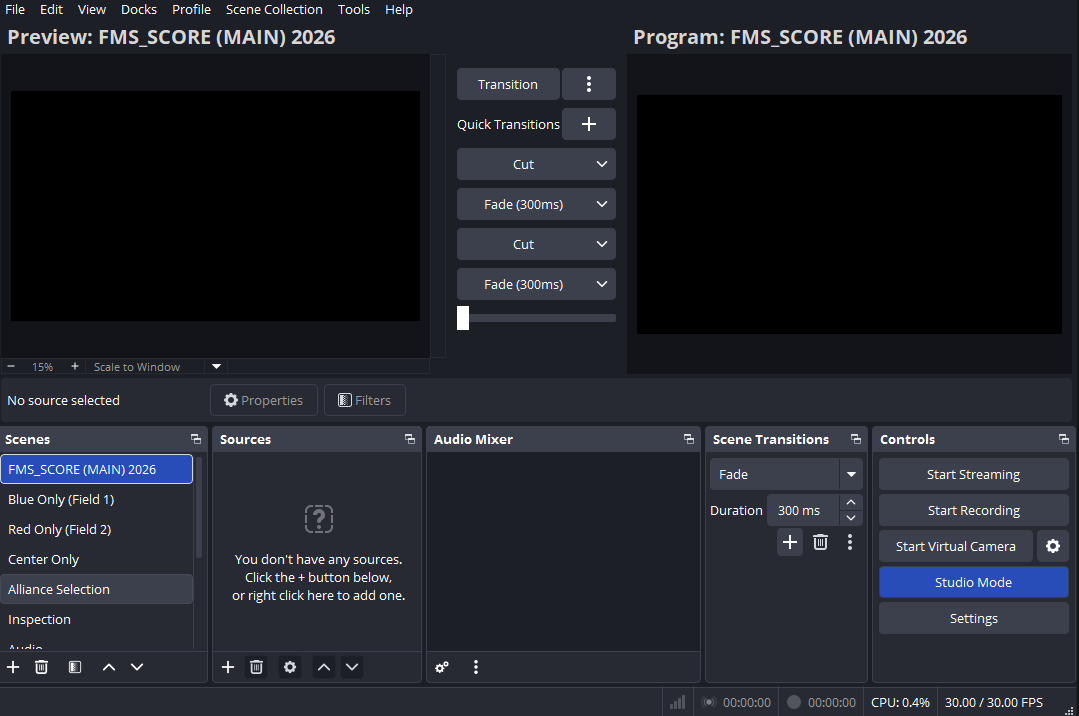
- Click on the “main” scene, in the window in the bottom-left corner of the window. This allows for a quick preview of setup progress, with regards to cameras.
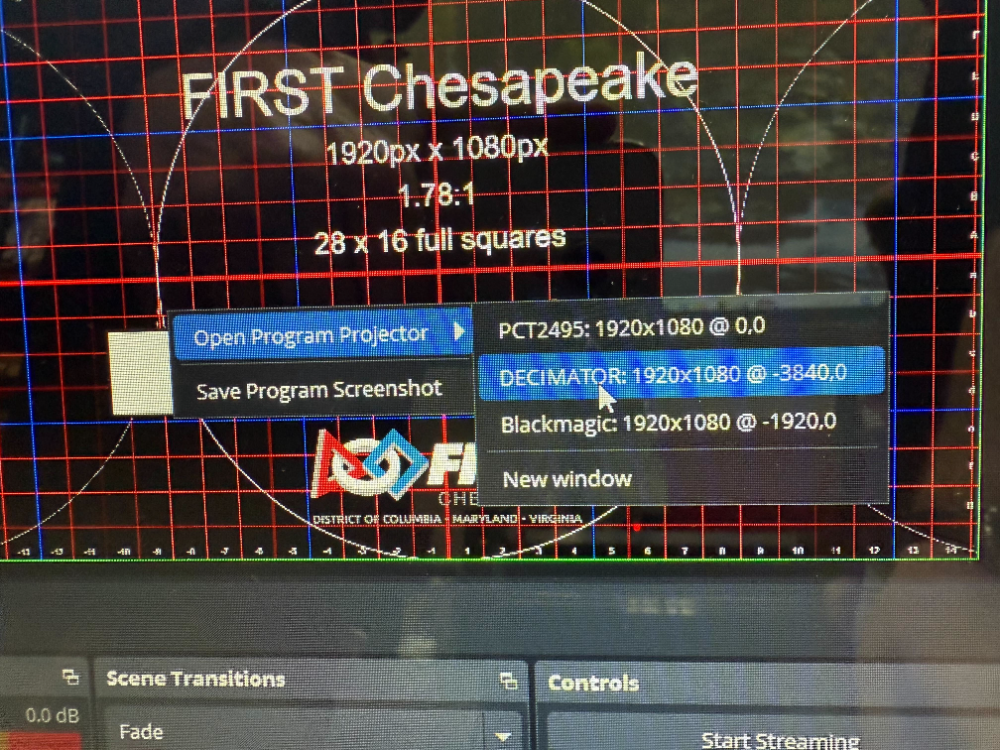
- Right-click in the image window labeled as “Program” (on the right side). Mouse over “Open Program Projector”, then click the item in the list that says “DECIMATOR”.
Stage 1f and Track 1 is complete! Typically, the next step is to carry out stage 2a. You can also return to the index.