This article will describe how to set up the FIRST Chesapeake display Raspberry Pis. All equipment for setting up the scoring system is located in the Scorekeeper Roadcase, seen below. 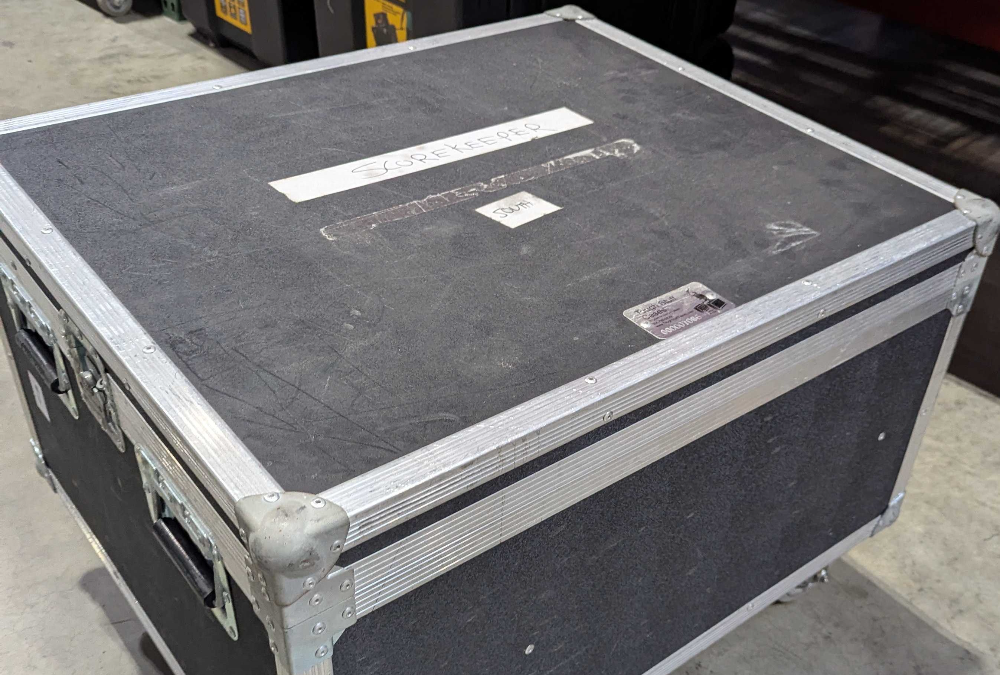
- Retrieve the scorekeeper laptop from the Scorekeeper Roadcase and place it on the scoring table.
Warning
The scorekeeper laptop contains specialized configuration that other components of the field and display system rely on. Use only the scorekeeper laptop to run the scoring software.
- Check with the scorekeeper or FTA to determine if FTC-Live software has been set up in accordance with the FTC-Live Setup Guide. You can set up the Raspberry Pis and monitors at any time, but they will not work properly unless at least the section labeled “Transfer Event Data” needs to be complete.
- Remove monitors from the scorekeeper road case.
- Attach the stands to each monitor using thumbscrews in the small plastic container.
- Place monitors on totes (use ones that are no longer needed for setup) in the center of the back side of the field.
- Connect each monitor to power using the labeled 25-foot power strips in the scorekeeper road case.
- Each monitor receives a Raspberry Pi through HDMI connection. HDMI cables are located in the scorekeeper road case.
- Power the raspberry pi with the USB A to micro USB cable in the scorekeeper road case to the same power strip as the monitor.
- Using an appropriate length of Ethernet cable, connect the scorekeeper laptop to one of the Ethernet ports labeled with “LAN” on the Streaming Unit.
Scorekeepers may want an Ethernet switch on the scoring table to connect additional devices. If this is desired, obtain an Ethernet switch from the Equipment Manager (located in the AV Production Drawers’s bottommost drawer) and connect the Ethernet cable to any port of the switch instead of directly to the laptop. Use a short cable to connect another port of the switch to the scorekeeper laptop. - Using an appropriate length of Ethernet cable, connect the Ethernet cables from each Raspberry Pi back to the two remaining Ethernet ports labeled “LAN” on the Streaming Unit.
Note
It does not matter which device goes to which LAN port, use any port for any hookup.
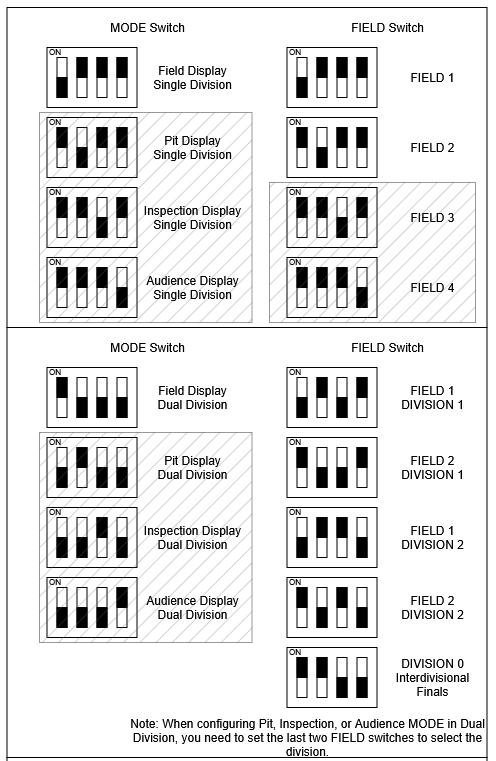
- Select the appropriate DIP switches for the location of the Raspberry Pi following the diagram below. Note that options with grey slashes over them are not commonly utilized in FIRST Chesapeake events and thus should not normally be selected.
- Power up the Raspberry Pi and wait for it to boot. If all goes well, the timing display for the selected field should appear in approximately 90-120 seconds. It may be necessary to plug a USB keyboard in to dismiss the initial popup window. If needed, use the TAB key to advance the cursor forwards and SHIFT+TAB to advance the cursor backwards. Spacebar acts as a click button. The Raspberry Pi kiosk does not support the use of a mouse.
If the kiosk does not load correctly, refer to the Raspberry Pi Kiosk Troubleshooting Guide for additional steps.